How we water the Gardens
The watering system is based three easily obtainable reticulation parts, the common 13 mm black plastic hose, 4 mm black plastic feeder hose often sold for use with micro sprays and the barbed connectors for use with the 4 mm hose. The hoses are obtainable in rolls whereas the barbed connectors can be bought singly or in bulk packs.
The 13 mm hose is buried in a grid in the area to be watered. We have used Tee connectors and 4 way connectors to ensure that the water pressure is even across the grid but we have not always done this and it doesn't really make that much difference if you have good water pressure. It pays to line up the arms of the grid with some landscape feature in the garden such as a fence post or tree so you can find the hose later. The idea is to provide a 'trunk line' within one and half metres of any plant from which you can run the 4 mm feeder hose, so being able to find the hose later could be important!
From the buried hose we connect the 4 mm hose
using one barb connector and this small feeder hose is then run to the
plant. It is recommend that the length of the feeder hose be at least 40 cm otherwise the
water pressure could be too great at the end. At the end of the
feeder hose we use a small
length of 13 mm hose pipe between 20 cm and 30 cm long, the length is not
critical and we recycle old bits of cut off 13 mm hose where we can. Usually
we cut one end at an angle to allow it to be pushed easily into the
ground but again this is not critical. In this short length of
hose we use a pair of secateurs to cut a few slots on an angle and half
way through the pipe. This is to allow the water to escape from the pipe
although it often comes out either end anyway. The second barbed
connector is used to connect the 4 mm hose to this short hose at least 2
centimeters below the top and this hose is buried upright along side the
plant. If the barb is less than 2 centimeters from the top, the water
jet may spray out of the top of the short pipe, possibly wasting water
as it doesn't go down to the roots. It pays to get the short hose as
close to the roots as possible even if you have to press it through the
root ball, hence the angled cut and the closer the better.
We then bury all the pipes in the ground at least 5 cm deep to prevent
sun damage, leaving about half a centimeter of the short pipe sticking
up from the ground. This is only to check that it is initially working
by peering down the short pipe with the water running as often the short
pipe gets completely buried over time but the system still works.
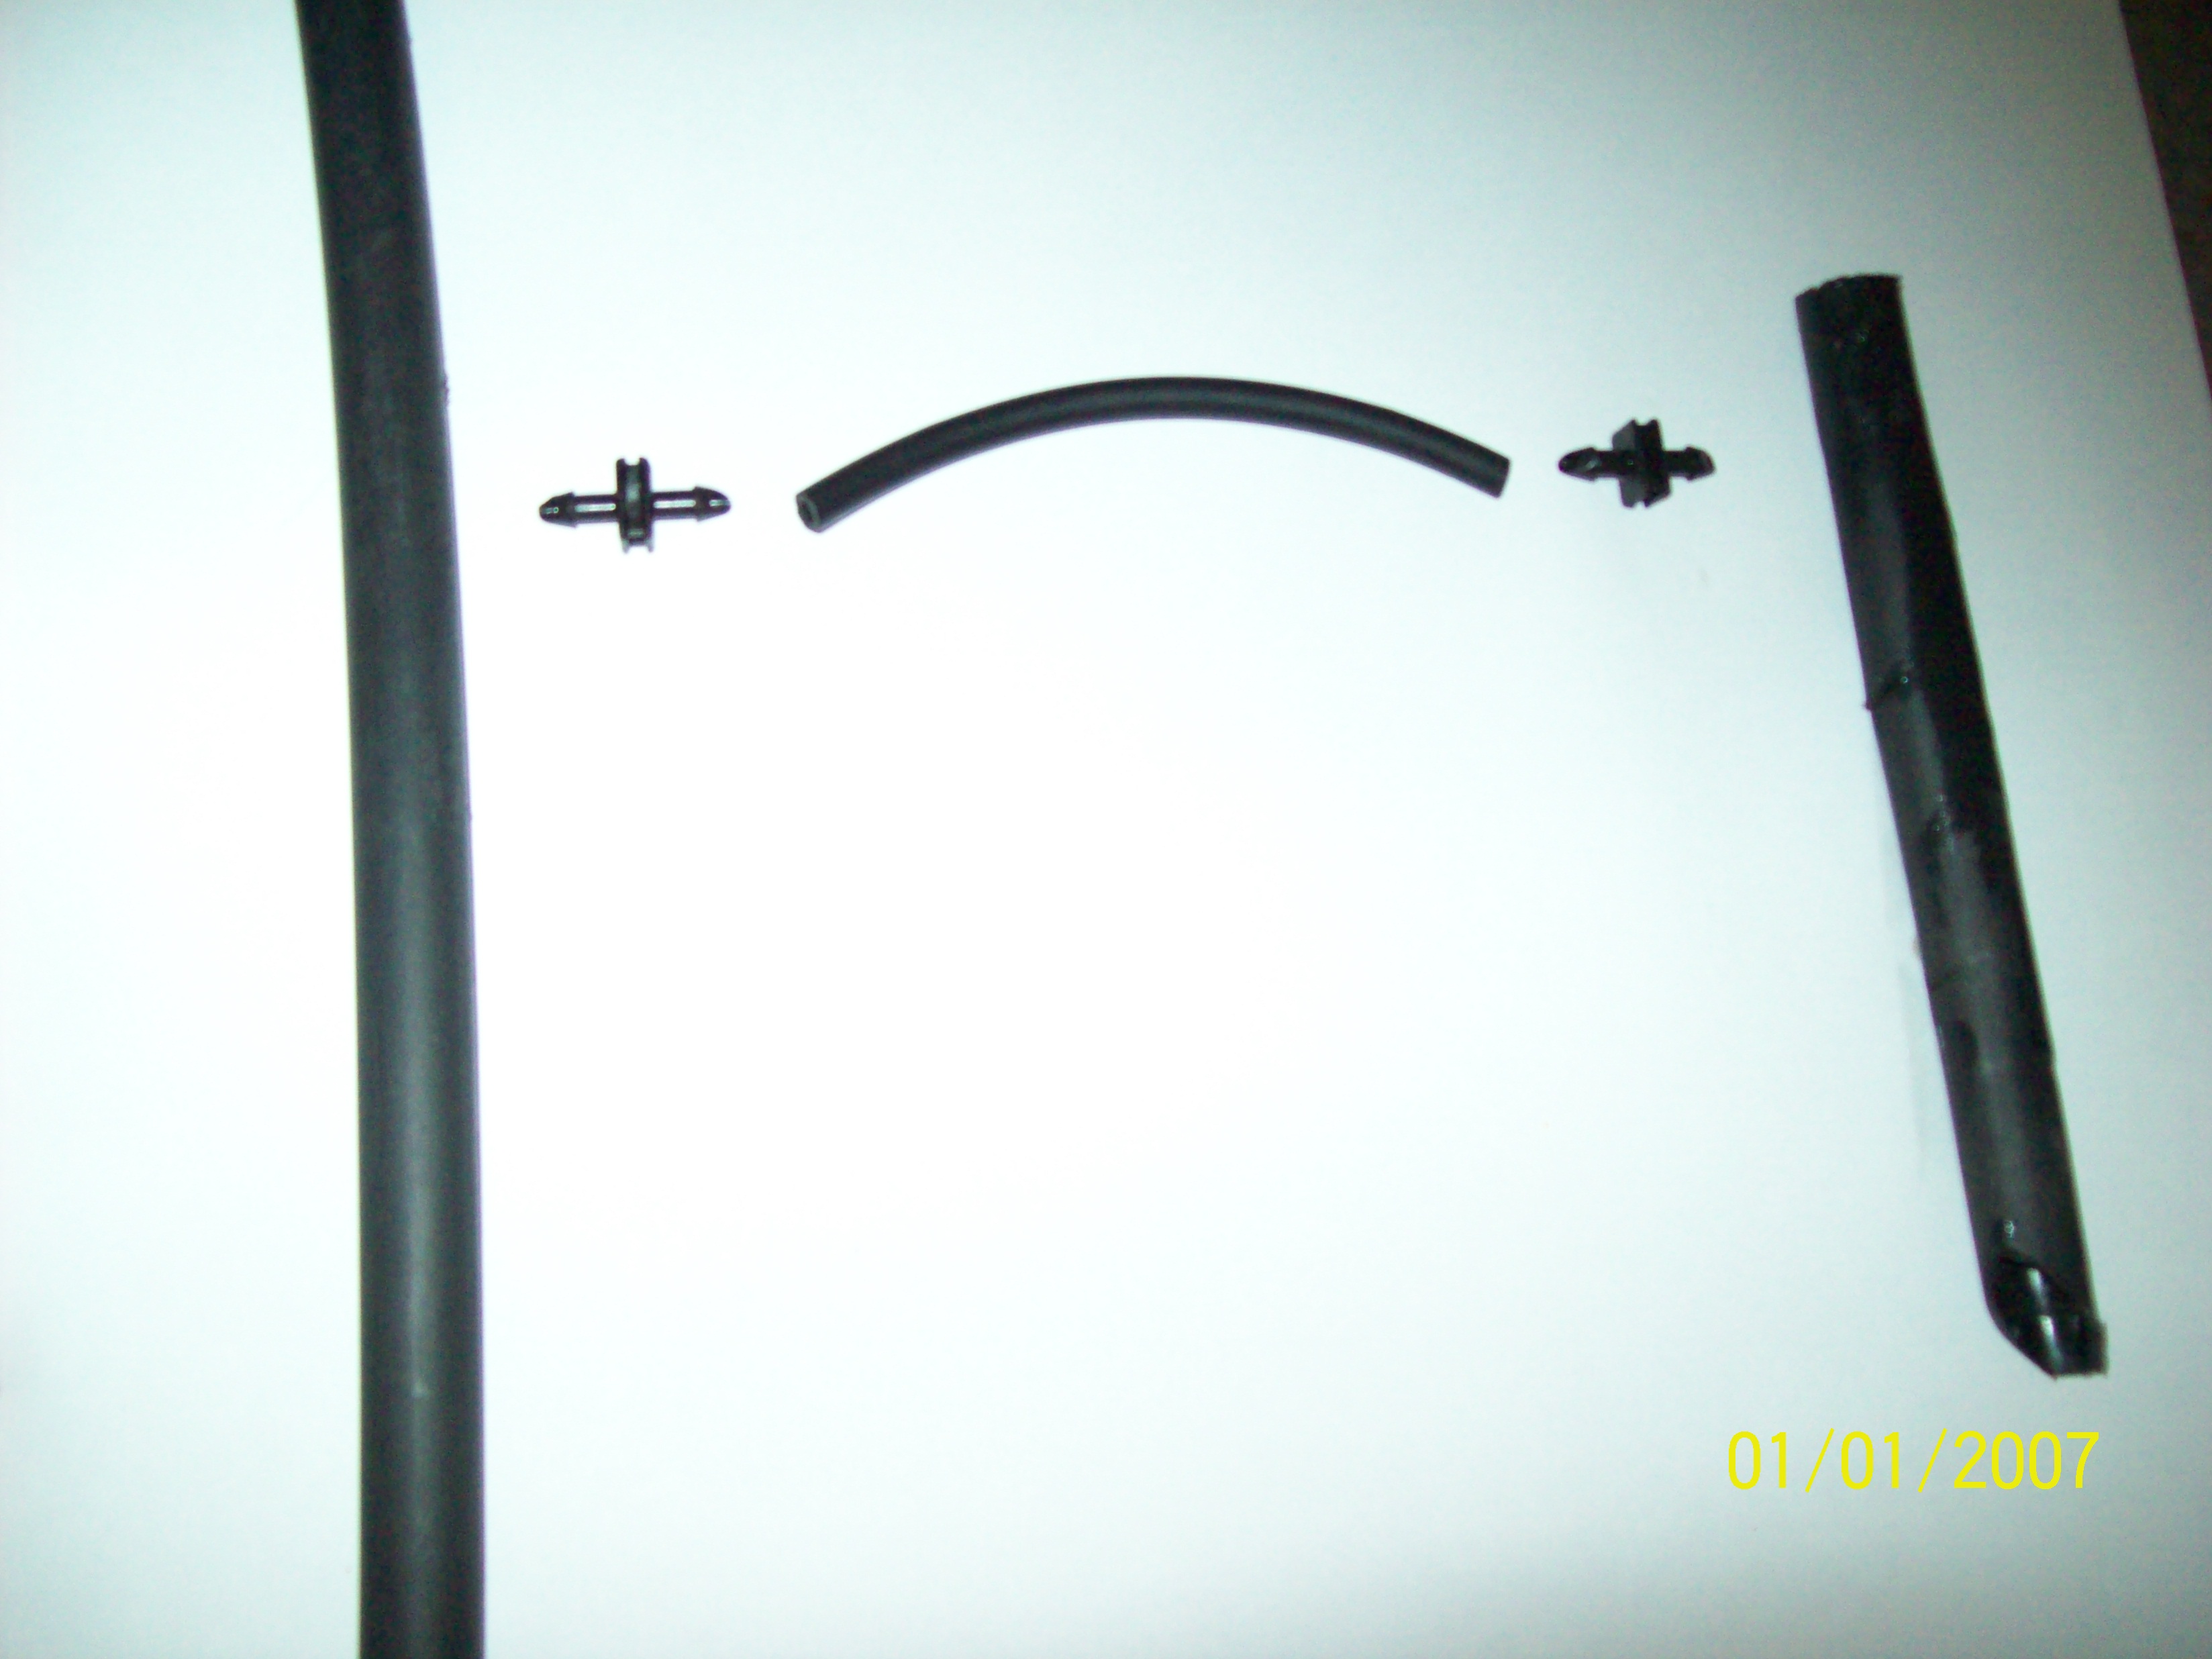
The basic components of the system, the 'trunk line' 13 mm hose, the 4 mm feeder hose, the barbed connectors and the short hose. The short length of the 4 mm pipe shown here is for illustrative purposes, we recommend that it be at least 40 cm long in practice.
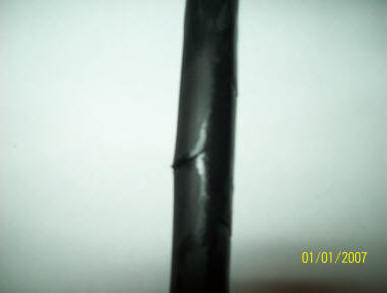
Close up of the short hose showing the cuts half way through the pipe to let the water out. You only need 2-3 cuts on either side of the pipe. Don't cut all the way through!
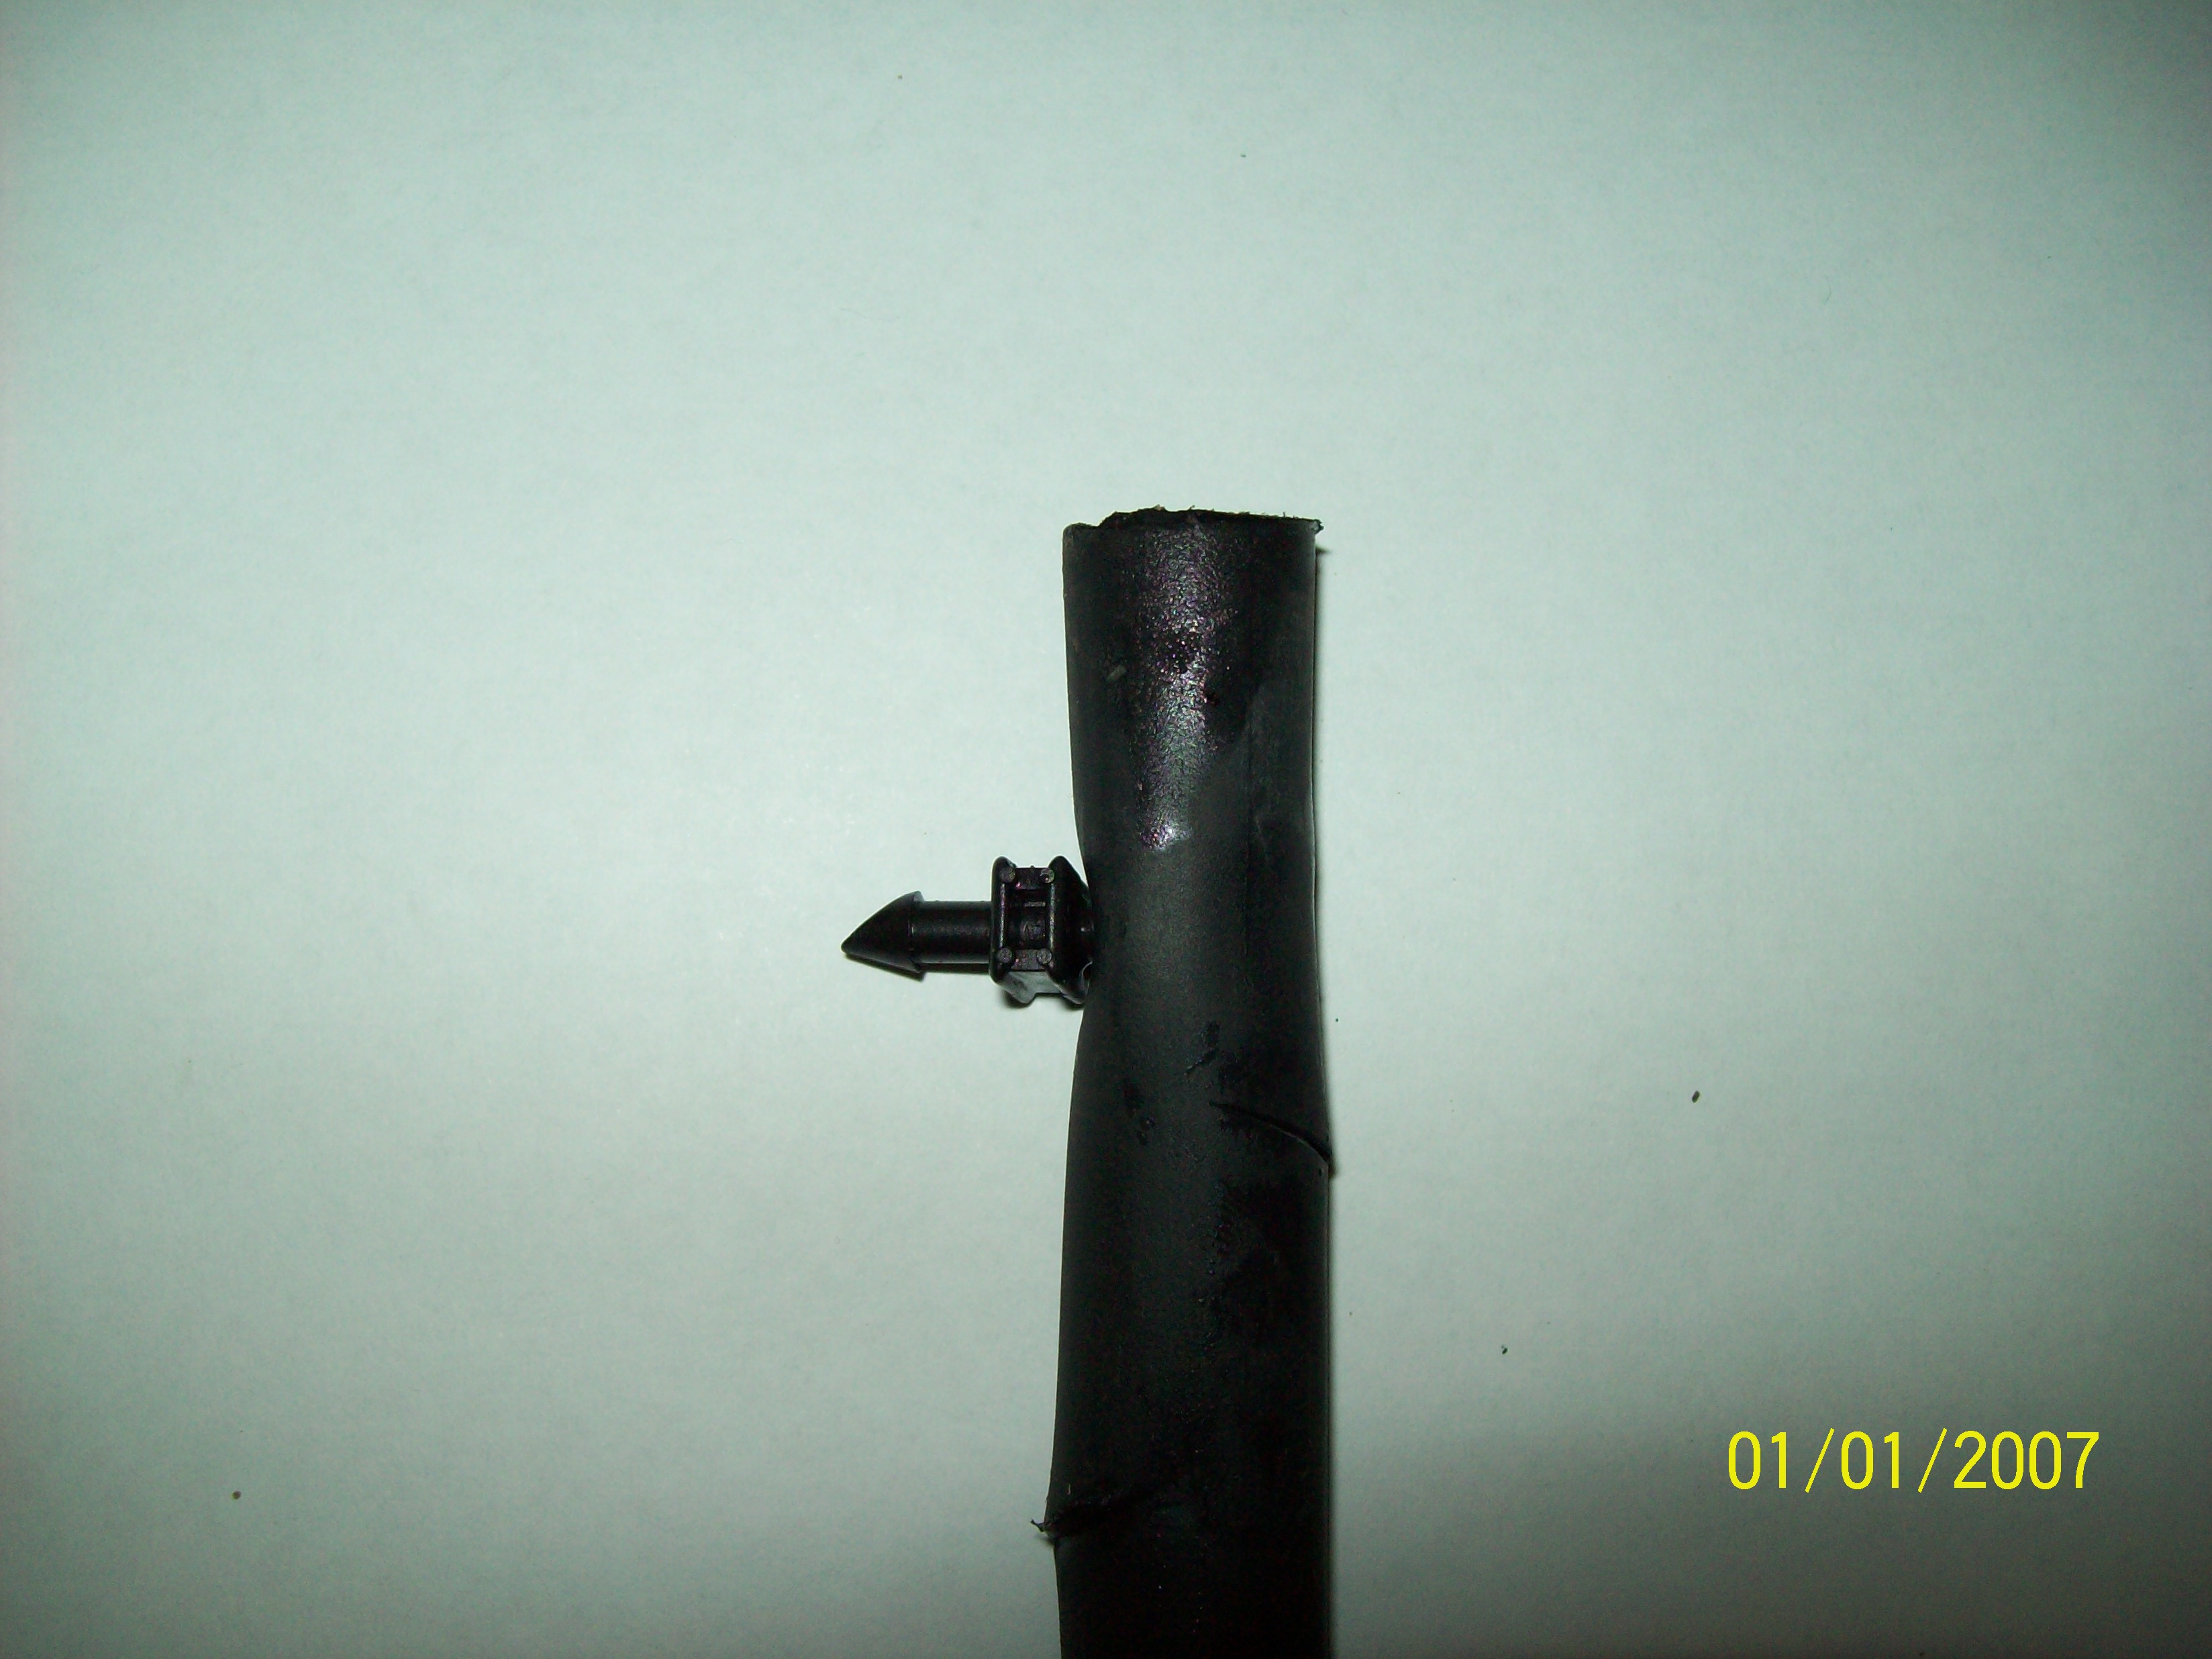
The barbed connector fitted just below the top of the short hose
The whole system installed to water
some watermelon seedlings. We haven't buried this one so you can see all
the pipes including part of the grid of 'trunk line' pipes. This one
connection will water all the seedlings. The large pipe in the centre is
just a marker so we don't forget where we planted the seedlings when
they get large.

The watering system at the B & B is driven from the mains water via electric valves and several timers. The timer is set to water any one sector for no more than 5 minutes. This time is based on the number and type of plants watered by that 'trunk line' and on some sections it can be as low as 2 minutes. As the water is passed directly to the roots, overwatering is not required, but the time is increased when more plants are added to the sector as the pressure is decreased slightly each time. We have found that it is better to have multiple sectors (we currently have 11 sectors) and shorter watering times than too many plants on one sector. Our large and prolific Lemon Tree has two connections, one each side, to provide enough water to the roots.
This system has also been used on a gravity feed from a water tank in our vegetable patch. There we have a 200 litre blue plastic drum which was filled from a larger rainwater tank. When full we turn off the feed from the larger tank and open a hand valve near the bottom of the drum to feed the 13 mm hose and this slowly waters every vegetable that has a connection, in spite of the low hydraulic head, until the 200 litres has been expended. This works this way when we have rainwater but we have to fill the drum with a mains water hose when the large rainwater tank is empty. However, if more rainwater or a bore were available, this is a method we would employ in the whole garden. It has the advantage that fertiliser can be added to the small tank to deploy to each plant. However, see the other page on this site as to how we fertilise the gardens.